How to Upload SSL Certificate in SiteWALL
Upload SSL Certificates and Key
2. Click on Configuration --> Certificates
3. Click on Add Certificate Button in the Certificate
Management Section.
SiteWALL supports certificate in .crt, .pem, .cer, and .txt format for uploads. If you have certificate in PFX format then pls follow the KB to convert it to .pem format
4. Enter the Profile Name (e.g. WebsiteName_Cert).
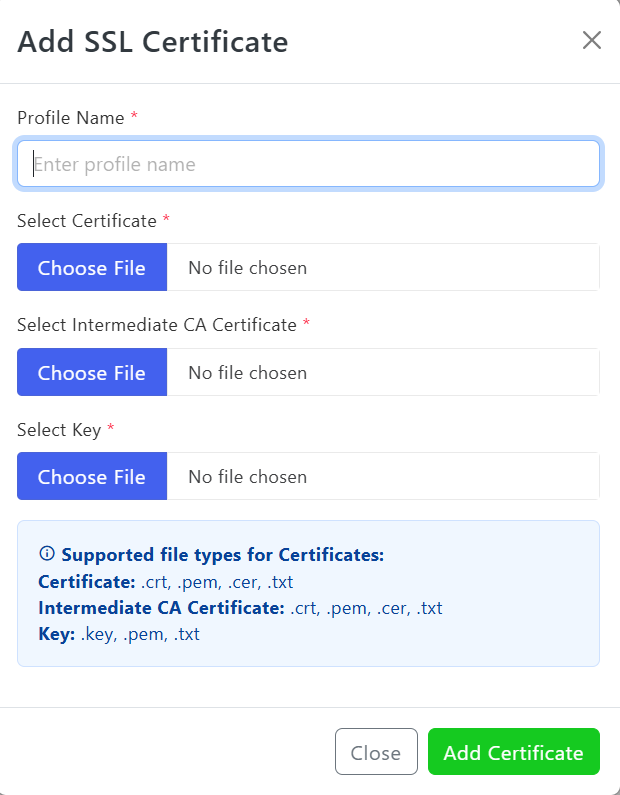
5. Select Certificate --> Upload root Certificate
6. Select Intermediate CA Certificate --> Upload CA Bundle Certificate
7. Select Key --> Upload private key
8.
Click on Add Certificate button to upload the Certificate.
================================================================
Mapping the Certificate to the Application
Once the SSL profile is successfully added, it can be mapped to the application.
1. Click on Configuration --> Applications
2. Click on the "Edit" icon located under the "Actions"
tab.
3. Click on the “Enable SSL” option under the SSL
Configuration section.
4. Select the SSL profile from the drop-down list and click on Update & Next to save the changes.
5. Complete all five configuration steps and
verify that the SSL configuration has been applied successfully.
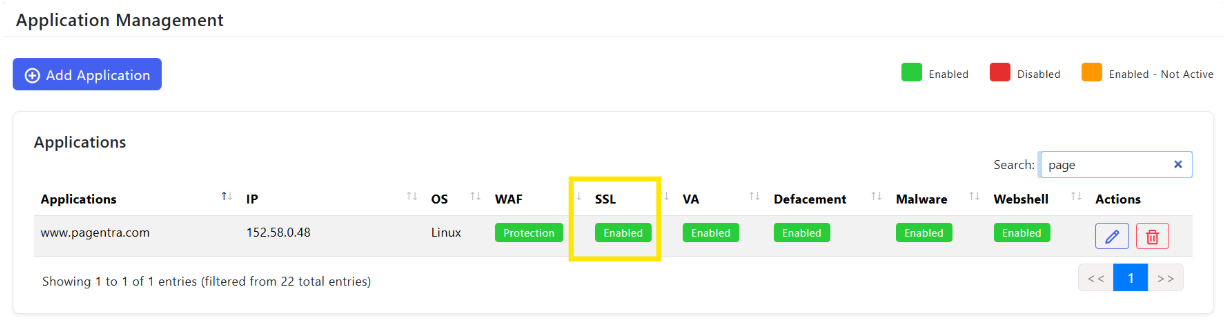
6. Once
SSL is mapped to the application, it will appear in the Application List as
shown in the snapshot below.

After completing all the steps, please verify that the website loads properly.